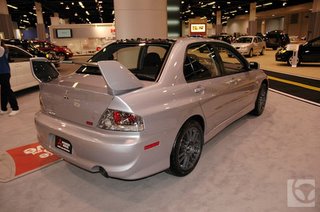
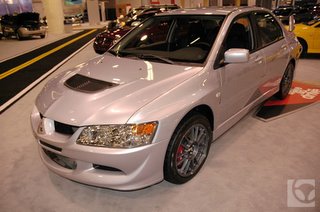
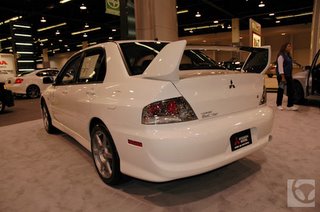
Lancer Evolution Car Craze By Sean Toh

Saturday, January 28, 2006

Your Cars Electrical System
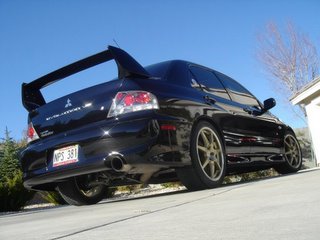
When the automotive industry was in its infancy, it used electricity only to ignite the fuel inside the engine. By the late 1920's, the electric starter replaced the hand crank, electric headlights made acetylene lamps obsolete and the sound of the electric horn drowned out the toot of the hand operated air horn. Today, a car uses an extensive electrical system just to produce, store, and distribute all the electricity it requires to allow it to run smoothly and offer the driver the comfort he now expects.

The Car Battery

The first major component in the car electrical system is the battery. The battery is used to store power for starting, and for running auxiliary devices such as clocks, radios and alarms when the engine is off. Another major component is the starter motor, which is used to start the engine (obviously). The third component is a charging device powered by the engine, known as the car alternator. This devices powers the electrical system , and charges the battery, but only when the car is running. With these basic components, the car maintains its supply of electricity. The voltage regulator keeps the voltage at the correct level and the power level stabilised, and the fuse box ensures that any minor electrical faults do not develop into major problems such as damaged components, or even worse, an electrical fire.

Many different auxiliary electrical devices are used in modern cars, such as: radios, cellular phones, rear window defrosters and electric door locks, as well as a vast array of motors powering everything from the moon roof on down.

Common Car Electrical Problems:

The battery is usually the first part of the system to develop a problem. Most batteries last between 3 and 7 years depending on brand and design. Batteries can be working perfectly one minute, and dead the next. More on this later.

Blown car fuse:

If one part of the electrical system not working like the interior lights or dash lights, then the first thing to check is the fuses. Check for the fuse panel under the dash, in the glove box, or maybe even in the engine compartment in some more modern cars. Most fuse boxes will be labeled with a circuit diagram. Modern cars use a blade type fuse which is rectangular in shape and transparent. Look for the wire, which runs through the fuse, and see if it has burned through. Any discoloring of the fuse is a good indication that the fuse has blown. If you are in any doubt, replace with a new fuse and test the system which is not working.

The Cars Alternator:

Does your car start ok, but your headlights become dim when idling? It could be a bad alternator. When the alternator cannot produce enough electricity to keep the electrical systems running and the battery will have to be used to take up the slack. This will eventually wear down the battery and not allow your car to start.

Troubleshooting your Cars Electrical System:

There is no tougher a system to troubleshoot on your car than the charging/starting system. This is due to the fact that there are a large number of things that can go wrong and it's difficult to test some components without special equipment. Let's go over some possible situations and their possible causes.

Car won't start, all I hear is a click but the engine does not turn.

  1. First check all battery cables for corrosion as this will keep power from flowing freely to the starting system. If they are dirty, clean with a wire brush and reattach. Apply a light coat of grease to the top of the terminals to prevent further corrosion.

  2. Battery could not have enough power stored in it to spin the engine. This can be caused by a bad cell in the battery or from a bad alternator not charging the battery when the engine is running. If you can get the car to a mechanic, have him or her test the battery and charging system with a special tester. This tester places a load on the battery and can tell the condition. They can also check to see if the alternator is working to it's full potential.

  3. Starter or solenoid could be bad. If you can not jump start the car and all of the battery cables are ok then suspect the starter.

Car won't start, I hear nothing.

  1. Check battery cables as above.

  2. Have the battery tested. There could be a bad cell causing a short. You can try jump-starting but often the car will not stay running.

Car won't start, all I hear is a horrible grinding noise.

Grinding noises point to the starter not properly meshing with the flywheel. This can be caused by a bad solenoid or a bad spot on the flywheel.

I have also seen starters loosen up so they no longer contact the flywheel at the proper distance. While not common, it is something to keep in mind.

Car starts but my headlights are dim at low engine speeds.

  1. Look to the alternator for problems. Take the car to your mechanic to have the alternator checked for proper operation.

  2. Check for loose wires going to the alternator. Also check for corrosion, as this will inhibit the alternator from charging properly.

  3. Check the tension on the alternator belt. If it is too loose, the belt may slip and not drive the alternator properly


    As you can see there are plenty of things to go wrong with the charging system and it is always best to take the car to your mechanic and have it tested before you go replacing parts blindly.

Preventing problems with your car's electrical system:

  1. Replace your battery every 4 years as a safety measure. It will save allot of headaches down the road.

  2. If your battery is not a sealed unit, check fluid levels in each cell. Only fill with distilled water and be careful around the acid, which is in the battery.

  3. Check your alternator belt frequently for cracks and tension. Replace per your cars manufacturers recommendations.

  4. Clean your battery connections at least once a year. Car stores sell a handy terminal cleaner which is basically a round metal wire brush, which works great. Once you re-attach the terminals, coat them with a layer of heavy grease or special purpose grease sold at car stores. This layer will block the air from reacting with the connectors and creating corrosion.

How to jump start your car:

Jump-starting your car is not a difficult task. First lay out the cables on the ground between the two cars. Make sure that the cable is not twisted or tangled and none of the end clamps are touching each other. You should make sure that the car with the good battery is running.

Step 1: Take the positive (red) clamp closest to the car with the good battery and hook it to the positive terminal of that car. The positive terminal will have a + sign on it and usually a red wire running to it.

Step 2: Repeat this step on the car with the bad battery, hooking up the positive clamp to the positive terminal on the battery. Make sure the clamps are contacting well and can not fall off.

Step 3: Take the negative cable (black) closest to the car with the good battery and hook it to the negative terminal of the battery. The negative terminal will have a - sign and usually a black wire running to it.

Step 4: This is the last step and the most important. Take the negative clamp closest to the car with the bad battery and attach it to a bare metal part of the engine. DO NOT hook it to the battery negative terminal as there maybe hydrogen gas present from the battery and a spark from the connection could cause an explosion.

That's it...... turn the key on the dead car and the car should start. If it does not, try revving the engine on the good car to boost the pwer coming from the alternator. If this does not work, try wiggling the cables to assure you have a good connection. GOOD sets of jumper cables are a necessity. I have had cheaper sets not jump-start a dead car. I actually had to double up two cheap sets to get enough current to start my car. The cheaper sets will have thinner cables, which have a higher electrical resistance and cannot carry enough current to start some stalled cars. I would suggest buying a cable, which has 4,6 or 8-gauge wire.

The Car Cooling System

The function of the engine's cooling system is to remove excess heat from the engine, to keep the engine operating at the most efficient temperature, and to allow the engine to reach its ideal operation temperature in the shortest time possible. In an ideal world, the cooling system keeps the engine running at its most efficient temperature no matter what the operating conditions are.

As petrol is burned in the engine, about one-third of the energy in the fuel is converted into power. Another third goes out the exhaust pipe unused, and the remaining third becomes heat energy.

A cooling system of some kind is necessary in any internal combustion engine. If no cooling system were provided, parts would melt from the heat of the burning petrol, and the pistons would expand so much they could not move in the cylinders (called "seize").

The cooling system of a water-cooled engine consists of:

  1. the engine's water jacket
  2. thermostat
  3. water pump
  4. radiator and radiator cap
  5. cooling fan (electric or belt-driven)
  6. hoses
  7. heater core
  8. expansion (overflow) tank

Burning of fuel in an engines produce very large amounts of heat and pressure; temperatures can reach up to 4,000 degrees F in the engine when the air/petrol mix is in certain proportions correctly. Under normal operating conditions the temperature is about 2,000 degrees F. The cooling system removes around 1/3 of all the heat that is produced in the engine combustion chamber.

The exhaust system also takes away much of the heat, but parts of the engine, such as the cylinder walls, pistons, and cylinder head, absorb large amounts of the heat. If a part of the engine gets too hot, the oil film will burn away and thus fail to protect it. This lack of lubrication can quickly destroy a car engine.

On the other side, if an engine runs at too low a temperature, it loses efficiency, the oil starts to get dirty (adding wear and reducing power output), deposits form, and fuel mileage is poor-- not to mention poor exhaust emissions! For these reasons, the cooling system only comes into action when the engine has heated up to its optimal temperature.

Type of Car Engine Cooling System

There are two types of cooling systems; liquid cooling and air cooling. Most auto engines are cooled by the liquid type; air cooling is used more frequently for airplanes, motorcycles and lawnmowers.

Liquid Cooled Engines

Liquid cooled engines have passages for the liquid, or coolant, through the cylinder block and head. The coolant has to have indirect contact with such engine parts as the combustion chamber, the cylinder walls, and the valve seats and guides. Running through the passages in the engine heats the coolant (it absorbs the heat from the engine parts), and going through the radiator cools it. After getting "cool" again in the radiator, the coolant comes back through the engine. This business continues as long as the engine is running, with the coolant absorbing and removing the engine's heat, and the radiator cooling the coolant.

A cooling system pressure tester is used to check the pressure in the cooling system, which allows the mechanic to determine if the system has any slow leaks. The leak can then be found and fixed before it causes a major problem.

Common Engine Cooling Problems:

Let's look at the common problems cars have with the cooling system.

  1. Broken tubing. Hoses and tubing wear out and leak coolant fluid. Once the coolant has left the system it can no longer cool the engine and therefore the engine will over heat.

  2. Broken fan belt. The water pump is driven by the engine through a fan belt. If this belt breaks the water pump can not turn and coolant will not be pushed through the car engine. This will also lead to the engine overheating.
  3. Damaged radiator cap. The radiator cap is designed to hold a certain pressure in the coolant system. Most caps hold 8 - 12 PSI. This pressure raises the point in which the coolant will boil and maintains a good, stable system. If your cap does not hold enough pressure, then the car engine could overheat on hot days since the system never becomes pressurised.

  4. Water pump failure. Most commonly you will hear a horrible screeching noise and will be able to see engine coolant leaking from the front of the pump or underneath the car. Often there are early signs of trouble with small spots of coolant under the car after being parked overnight and a strong coolant odor whilst you are driving.

  5. Head gasket. Do you have large amounts of white smoke flowing out of your exhaust? Then you could have a problem with your head gasket. The head gasket seals the cylinder head to the engine block and also seals the coolant passages. When this gasket fails coolant can enter the cylinder and it will be turned to vapor as the engine fires. Head gaskets most often fail after the engine has overheated in the past. When very hot, the cylinder head can warp and prevent the engine head gasket from sealing properly.


Preventive Maintenance on Engine Cooling Systems

  1. Check all belts and hoses regularly. (at oil change is a good time)

  2. Look out for coolant leaks underneath the car, they could be signs of trouble to come.

  3. Change your coolant every 2 - 3 years depending on the manufactorers recommendations.

  4. Inspect your radiator cap for deterioration of the rubber seal. Replace if you think it is worn. $5 - $10 is cheap insurance.

  5. Have your coolant system flushed every 5 years. It gets all the corrosion which has built up out of the system.

Friday, January 27, 2006

Checking Car Fluid Levels

Keeping your vehicle in tip-top shape requires constant monitoring of vital fluids. Read you owners manual and look for a diagram of the engine. Most times there will be a diagram showing where to check all the major fluids. This should be your starting point. If your manual is lost in the glove box or you never had one, then ask your mechanic or a friend who knows cars to show you all the places to check. There are 4 major levels to check on most cars.

Car Engine oil

Usually towards the front of the engine and marked "OIL" Always check your oil level with the engine OFF. Remove the dipstick and wipe the oil off with the rag or towel then put the dipstick back into the hole. Now pull out and get a reading. You might have to hold the dipstick to the light to get a good reading as fresh oil can sometimes be hard to see. On the dipstick there will be two marks indicating a maximum and minimum level for the oil. Make it a habit of checking your oil every two weeks.

Car Transmission fluid

If you have an automatic transmission then you will have a dipstick to check the fluid level. It is most commonly found towards the back of the engine compartment or towards the passenger side. You should find out how to check the fluid by looking at the owner’s manual or on the dipstick itself. Most cars have to be running with the transmission in park or neutral. Also the transmission should be warmed up to give a true reading. Make sure the car has been driven for a short distance to make sure everything is up to operating temperature. Checking the level is just like checking your oil, wipe off dipstick, replace, pull out again and check level. If you have a manual transmission there is no dipstick and to check the fluid level you must crawl under the car and remove a fill plug. I would have your mechanic check this for you once a year if you do not feel comfortable doing this.

Car Engine coolant

- -- CAUTION -- Never open your radiator cap when the engine is hot ! The pressure in the system can send hot coolant splashing out on to you. Most cars have an overflow bottle, which will have level markings. Keep the coolant between these markings. If you have to open the radiator, make sure the engine is cold.

Power steering fluid

Your car uses oil to assist in steering the car. The fluid is usually checked at the pump, but can be away from the pump in a separate reservoir. Like the transmission, this fluid should also be checked when up to operating temperature. Most commonly the level is measured by a small dipstick attached to the cap of the reservoir.

Car Brake fluid

On most newer cars you can check brake fluid level without removing the cap on the master cylinder. There will be level markings on the side of the plastic reservoir. If you have to remove the cover to check the fluid level, be careful not to spill any fluid on the surrounding paint. Brake fluid makes a nice paint remover :-)

Windshield washer fluid

That's the magic blue liquid that squirts out of your hood. Most reservoirs have the level marked on the side but some newer cars have them buried underneath everything so you can not see. Just fill to the top, there is no harm in overfilling.
If you need to add any fluids to bring the levels up, a funnel is helpful to avoid spills. Keep track of how often you add oil, and transmission fluid. Frequent additions can point to leaks and engine wear.

Car Fluid Levels

Give your car a quick check up and ensure that all of its fluid levels are at the correct level. Including oil, engine coolant, brake fluids, power steering and even the window washers.

Thursday, January 26, 2006

Car Tools For The DIY'er

If you are a car owner who occasionally works on his or her own car, please don't go out and spend thousands of dollars on high priced tools. Professional mechanics make a living with their tools and need the best. If you are doing minor repairs on your own vehicles a lower cost tool set will do just fine. We have teamed up with carBarn.com to bring you the best price on tools for the DIYer. Keep in mind you can find most of these tools at your local parts store, but probably not at these prices. Let's look at the basics you will need for most common jobs.

The car oil change:

Car Lifting tools:

To gain access to the oil pan you need to get the front wheels off of the ground safely. Never leave the car supported only by a jack. A good set of jack stands or ramps are the safest way to go. Also don't forget to chock up the rear wheels to keep the car from sliding back. Even though you may have the emergency brake set, they can fail.

Oil filter spanner:

Nothing is more frustrating than trying to get an oil filter off without the right spanner. I have gone to the extent of poking a screwdriver through the filter to spin it off..... this is not the cleanest way to change an oil filter.

Funnel:

You have to get the new oil into the engine, and the less you spill, the less will burn off later while driving. Any funnel will do, but look for one with a long flexible neck, which will help getting into those tight places.

The brake job:

Disc brakes:

You will need some special hex or torx sockets to get the caliper loose. Do not try using the wrong tool like a vise-grips or filed down bit.... you will damage the bolts. You will also need to retract the brake pistons once you have the old pads out. Using a C-clamp does work, but you have to be careful not to damage the pistons.

Drum brakes:

There are special tools, which allow you to remove the clips, which hold the shoes to the backing plate. Also you will need an adjuster to adjust the shoes once you have everything back together.

Bleeding the brakes:

Get a good kit, which includes a sealed container to collect the expelled brake fluid.

General car tools:

A good Quality Tool Set:

Make sure you have metric spanneres as all import cars have metric fasteners and most if not all-new domestic cars do also. If you plan on doing advanced work, or plan on eventually working as a professional mechanic consider buying a set of Craftsman tools. I have found them to be the best value and you cannot beat the lifetime guarantee. Plus wherever you are, there is a Sears store to take your broken tools in for replacement.

Car Repair Manual:

You wouldn't bake a cake without a recipe.... would you?? Make sure you have a manual by your side before you start working on your car. I can only give you general guidelines, but the manual will give you all of the specifics for your car, truck or SUV.

Wednesday, January 25, 2006

How Your Cars Suspension Works

"Suspension," when discussing cars, refers to the use of front and rear springs to suspend a vehicle's "sprung" weight. The springs used on today's cars and trucks are constructed in a variety of types, shapes, sizes, rates, and capacities. Types include leaf springs, coil springs, air springs, and torsion bars. These are used in sets of four for each vehicle, or they may be paired off in various combinations and are attached by several different mounting techniques. The suspension system also includes shocks and/or struts, and sway bars.

The Development of Car Suspension

Back in the earliest days of automobile development, when most of the car's weight (including the engine) was on the rear axle, steering was a simple matter of turning a tiller that pivoted the entire front axle. When the engine was moved to the front of the car, complex steering systems had to evolve. The modern automobile has come a long way since the days when "being self-propelled" was enough to satisfy the car owner. Improvements in suspension and steering, increased strength and durability of components, and advances in tire design and construction have made large contributions to riding comfort and to safe driving.

Cadillac allegedly produced the first American car to use a steering wheel instead of a tiller.

Car Steering Systems

Two of the most common steering mechanisms are the "rack and pinion" and the standard (or recirculating-ball) systems that can be either manual or assisted by power. The rack and pinion was designed for sports cars and requires too much driver muscle at low speeds to be very useful in larger, heavier cars. However, power steering makes a heavy car respond easily to the steering wheel, whether at highway speeds or inching into a narrow parking place, and it is normal equipment for large automobiles.

The Function of Car Suspension

The suspension system has two basic functions, to keep the car's wheels in firm contact with the road and to provide a comfortable ride for the passengers. A lot of the system's work is done by the springs. Under normal conditions, the springs support the body of the car evenly by compressing and rebounding with every up-and-down movement. This up-and-down movement, however, causes bouncing and swaying after each bump and is very uncomfortable to the passenger. These undesirable effects are reduced by the shock absorbers.

Common Suspension Problems:

  1. Shocks and struts can wear out and affect handling. If you car bounces excessively over bumps and leans hard in corners, your shocks could be warn. Look behind the wheel for the shock or strut and look for leaking oil. This is a sure sign of a worn shock or strut.

  2. Ball joints. Ball joints wear and can cause your car to wander while driving down the road. This is dangerous as they can separate and cause you to lose control.
    Preventive maintenance:

  3. Check your shocks or struts for leakage frequently. Also pay attention to how your car handles. If you notice the ride deteriorating take your car in to have the struts checked.

  4. Ball joints should be checked when your car is inspected, if not, have your mechanic check them at least twice a year.

  5. At each oil change make sure you or your mechanic lubricates the ball joints and any other suspension components. Some components cannot be lubricated as they are sealed from the factory.

Tuesday, January 24, 2006

Your Car Fuel System

The car fuel system feeds your engine the gasoline/diesel it needs to run. If anyone of the parts in the system break down your engine will not run. Let's look at the major parts of the fuel system:

Fuel tank:

Basically a holding tank for your fuel. When you fill up at a petrol station the petrol travels down the filler tube and into the tank. In the tank there is a sending unit, which tells the petrol gauge how much petrol is in the tank.

Fuel pump:

On newer cars the fuel pump is usually installed in the fuel tank. Older cars have the fuel pump attached to the engine or on the frame rail between the tank and the engine. If the pump is in the tank or on the frame rail then it is electric and is run by your cars battery. Fuel pumps mounted to the engine use the motion of the engine to pump the fuel

Fuel filter:

Clean fuel is critical to engine life and performance. Fuel injectors have tiny openings, which clog easily so filtering the fuel is the only way to prevent this. Filters can be before or after the fuel pump, sometimes both.

Fuel injectors:

Most domestic cars after 1986 and earlier foreign cars came from the factory with fuel injection. Instead of a carburetor to mix the fuel and air, a computer controls when the fuel injectors open to let fuel into the engine. This has resulted in lower emissions and better fuel economy. The fuel injector is basically a tiny electric valve, which opens and closes with an electric signal. In the picture below you can see the injectors towards the outer part of the intake. By injecting the fuel close to the cylinder head the fuel stays atomized ( in tiny particles ) so it will burn better when ignited by the spark plug.

Carburetors:

A carburetor takes the fuel and mixes it with air without computer intervention. While simple in operation, they tend to need frequent tuning and rebuilding. This is why most newer cars have done away with carburetors in favor of fuel injection.

Common Car Fuel System Problems:

I would say the most common problem is a clogged fuel filter. Make sure you follow your manufacturers recommendations as to when you should change the fuel filter. This information should be in your owner’s manual. Symptoms include sputtering at high speeds or engine not starting at all. Always check the ignition system first, if that's ok then the next suspect is the fuel filter.

Next most common problem is the fuel pump failing. Most modern electric fuel pumps can be heard when you turn the key on. If you don't hear the pump running and your car will not start, it could be your fuel pump. The first thing a mechanic will check is the relay, which sends power to the pump. If this is operating correctly then the pump will have to be replaced.

Last but not least are dirty injectors. While the fuel filter does a good job of filtering the fuel, it's not perfect. Over time deposits and tiny particles lodge themselves in the injectors. This can clog and injector and prevent it from delivering the fuel the engine needs. It can also cause an injector to stick open and send too much fuel into the engine. A regular addition of fuel system cleaner like STP Injector Cleaner, or Techtron fuel system cleaner can help keep your injectors clean. Most petrol stations, department stores and all automotive parts stores will have a good cleaner available. Add it to your empty tank right before you fill up and it will clean as you drive. I recommend doing this every 3 months to keep your injectors performing like new. Mechanics also offer a cleaning service where they actually disconnect the fuel line and flush cleaner through the engine. This is only necessary when you let your injectors get to a point where they can not be cleaned by a store-bought product. Regular use of a good in-tank cleaner will keep you from having to pay for this service.

Where do you buy your petrol?

Believe it, or not, it can make a difference. Always buy from a well know national brand service station. Petrol stations, which are not affiliated with one brand of petrol, tend to get whatever is left at the end of the day from the delivery truck. One day them might get Texaco, and Exxon another. Also water mixed with petrol will cause problems with your engine. The engine will not run right, plus the water will promote rust in the fuel system. I have experienced this when I purchased petrol at some no-name petrol stations. Your car will feel sluggish and sometimes refuse to run if there is enough water in the petrol.

Fuel Octane rating tip!!!!

Putting super in the tank will not get you any more performance or petrol mileage unless specifically recommended by your cars manufacturer. If your owners manual says put in 87 octane...... DO IT. You are throwing money out the window if you are filling up on Super or Premium and you only need Regular.

Monday, January 23, 2006

Changing a Tyre

It always happens at the worst times! You need to know how to change a tyre even if you have an auto club membership. Depending on where you get a flat tyre, there may not be a phone nearby to call a tow truck. Let's take is step by step and always remember to read your owners manual, there will be detailed instructions relating to your car there.

I would like to mention a few tips for getting to the side of the road safely if you have a tyre puncture whilst driving on the road.

  1. You must stay calm, do not panic!

  2. Slowly take your foot off of the gas and let the vehicle coast to a stop.

  3. Do not make any sudden braking or steering actions.

  4. Put your hazard lights on to alert other drivers.


Now that you are safely off of the road you can go about changing your tyre

Simple Steps to Changing your Car Tyre

Tyre Changing Step 1: (Stopping)

Make sure you are on firm flat ground and sufficiently far away from the traffic. If you are not, then try to drive to a more suitable spot, but only if you can do so safely. Try to avoid driving back onto the road and into traffic.

Tyre Changing Step 2: (Safety First)

Make sure your handbrake is on and put the car in Park or 1st gear if you have a manual transmission. Ensure that the engine is turned off.

Tyre Changing Step 3: (Tools)

Locate the spare tyre, jack, and wheel wrench. These are usually located in the trunk underneath the carpet on cars. Trucks usually have the jack and wheel wrench behind the seat or under the hood, with the spare tyre under the bed.

Tyre Changing Step 4: (Instructions)

Typically there are instructions printed on the jack or somewhere near the storage compartment. Read these instructions, they will tell you where to jack the vehicle and any special steps you will need to take.

Tyre Changing Step 5: (Getting started)

First remove the hubcap or wheel cover. The wheel wrench often has a flat end, which you can use to pry off the cover. If not, a screwdriver will work just fine.

Tyre Changing Step 6: (Lug Nuts)

Before you jack the car up you will want to break loose the wheel nuts. The weight of the car will keep the wheel from spinning and allow you to apply more force to the nuts. You do not want to completely remove the wheel nuts yet.... just break them loose. Once the wheel nut begins to move, STOP and move onto the next one. I often carry a small pipe, which will fit over the wheel wrench. This pipe can provide additional leverage and allow you to get those stubborn wheel nuts off. Always remember righty tighty, lefty loosy. Turn the wheel nuts left or counter clockwise to loosen.

Tyre Changing Step 7: (Jack the car)

Now you should be able to jack up the car. Locate the manufacturer jacking points by reading the owners manual or the instructions near or on the jack. Most cars will have a reinforced lip where the jack can be placed. If you can not locate this, look for a solid portion of the frame to jack on. Make sure the jack is on firm level ground and start jacking. Take it slowly and only go as far as you need to get the wheel completely off the ground.

Tyre Changing Step 8: (Remove Tyre)

The wheel is off the ground and it's time to remove the wheel nuts. Use the wrench or your fingers to remove the nuts. Slowly take the wheel off and set it to the side.

Tyre Changing Step 9: (New Tyre)

Get the new wheel and put it on the car. Tighten the wheel nuts as tight as you can without the wheel spinning. Don't worry about getting the nuts super tight, as you will do the final tightening when the car is off of the jack.

Tyre Changing Step 10: (Jack the Car)

Let the car down off of the jack and get your wheel wrench. Tighten the wheel nuts in a star pattern if there are five nuts. Start with one wheel nut and skip the next one until they are all tight. If you have 4 nuts, just tighten the opposite nut from where you started and then the remaining two in any order.

Tyre Changing Step 11: (Wheel Covers)

Replace your wheel cover or hubcap and clean up the jack, wheel wrench and blown tyre. If your spare tyre had air in it, you should be able to continue your journey. You may be organised enough to have a tyre pump that runs off of the cigeratte lighter in your car. If you do check the tyre pressure that you should pump to and inflate the spare tyre accordingly.

Finally: Remember if you have a temporary spare tyre (AKA doughnut) you can only drive a few miles to a service station and usually not over 50 MPH.

Sunday, January 22, 2006

Power of X


IS YOUR MOUTH WATERING YET?

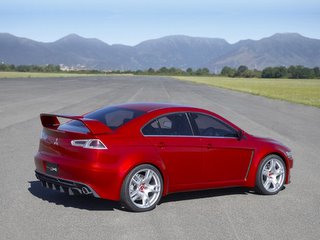
It should be. Leaner, meaner and more muscular than ever before, the forthcoming Mitsubishi Lancer Evolution X is set to be the most potent “Evo” to date. With its bulging wheel arches, ferocious-looking front grille and menacing stare, you quickly realise that this car is not for the faint-hearted.

When it comes to the interior (above right), a simple, functional layout allows the driver to concentrate fully on the job at hand, while an LCD screen relays real-time information on the vehicle’s technical status. While this new incarnation looks like no other Lancer Evolution you’ve ever seen before, rest assured that the legendary “Evo” pedigree is still present and correct.

As with previous Lancer Evolution models, which have proved themselves on the world’s toughest rally stages, the motivating force behind this beautiful beast is a 2-litre, 4-cylinder,
turbocharged engine. Needless to say, the DOHC MIVEC power-plant in the new Lancer Evolution X has been developed even further, and is designed to deliver instant response – whatever the revs – and keep on pulling all the way to the red line.

A clutchless, six-speed, auto-manual transmission provides slicker shifting through the gearbox, with paddle shifters mounted on the steering column. While exact figures have yet to be released, expect acceleration and speed to be in the region of “jaw-droppingly quick”. Handling is also improved, and body stiffness increased, while the use of aluminium in the bonnet, boot lid, bumpers and roof reduces weight even further. Combine this with a lower centre of
gravity and you have extraordinary levels of roadholding. All in all, a nimbler Lancer Evolution than ever before.

And when it comes to safety, the Lancer Evolution X features the latest technical developments – in the form of Mitsubishi’s Super All Wheel Control (S-AWC). Based on the full-time 4WD
system seen on previous Lancer Evolution models, S-AWC adds Active Brake Control, Active Steering System and Mitsubishi Motors’ “Roll Control Suspension” technology, to create a
fully integrated system. As with its predecessors, expect the Lancer Evolution X to combine
supercar performance with everyday practicality.
Want one? Course you do.

Preventive Maintenance on Car Engines

The engine is the heart and soul of your car, but instead of pumping plasma blood around veins, the engine pushes petrol and airl. The main focus of the engine is to transform the air and petrol into rotary motion so it can drive the wheels of the car.

Preventive Maintenance on Car Engines:

Change your oil regularly

Give your engine a chance to warm up before driving if possible. Let the oil get into all parts of the engine before driving. This is even more critical in cooler temperatures when the oil is cold and sluggish.

Change your timing belt or chain at your manufacturer's recommended interval.

Avoid "snake oil" additives as advertised on late night TV. Regular oil changes and good maintenance habits will keep your engine running it's best.

If you have a turbo charged engine, give the engine a minute or two cool down before turning it off. This cool down period allows oil to circulate and cool down the bearings. If you shut off the engine immediately after hard driving, the oil can gum up around the hot bearings and create problems down the road.

What to discuss with your car mechanic:

If you have to replace your engine, discuss the benefits of buying used versus new. If you plan on keeping your car for some time, a new engine might be the best bet. Sometimes new engines are not much more expensive than rebuilt ones, and offer the best solution.

When trying to diagnose engine noises, be as descriptive as possible. Take note to when the noise occurs; at what throttle position, and when the noise started occurring. Sometimes changing the weight of oil being used can cause a new noise to crop up. Make sure you mechanic knows if you changed oil brands or weight recently.